
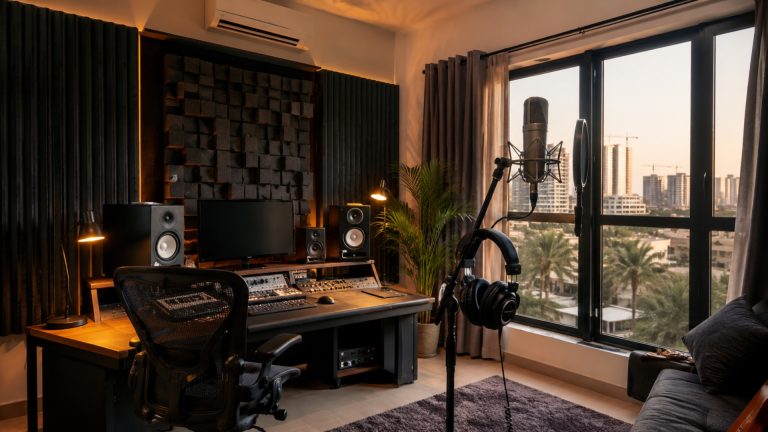
Record yourself talking in a typical Lagos room with tiled floor, glass windows, and maybe a ceiling fan for company, and play it back. You will hear that hollow, slightly distant quality, like you’re speaking from inside a pot. That’s your room talking over you.
Here’s the thing most new podcasters learn too late: the room is part of your equipment.
A ₦500,000 microphone in an echoey room sounds worse than a ₦80,000 microphone in a treated one. And no plugin fully removes echo after the fact – once it’s baked into the recording, it’s there forever. We’ve heard this story from too many creators who came to us after the fact.
The good news: you don’t need to build a studio. You need to understand one idea and apply a handful of cheap fixes.
The one idea: hard surfaces bounce, soft surfaces absorb
Sound leaves your mouth, hits surfaces, and bounces back into the microphone a few milliseconds late. Hard, flat surfaces (tile, glass, concrete – i.e., Lagos architecture) bounce nearly everything. Soft, irregular surfaces (fabric, foam, bodies, books) absorb and scatter it.
Every hack below is just this idea wearing different clothes: put soft stuff between your voice and the hard surfaces.
The free fixes (do these first)
Choose the right room. The bedroom with curtains, a rug, and a wardrobe full of clothes beats the empty spare room every time. Furniture is treatment.
Get close to the mic. This is the most powerful free fix in audio. At a hand-span from your mouth, your direct voice is loud relative to the room’s reflections; at arm’s length, the room competes. Close mic technique alone can make an untreated room usable – it’s also why broadcast dynamic mics dominate podcasting, as we covered in the equipment checklist.
Don’t face a window or bare wall. Your voice bounces straight back into the mic. Face into the room, or toward the curtains.
Fill the room with people and things. A recording with three guests, chairs, and a table sounds noticeably drier than the same room empty. Bodies absorb sound. Use it.
The cheap fixes (a weekend and small money)
Curtains – heavy ones, and more than the window needs. Thick curtains are the best naira-per-absorption deal in Lagos. Run them wider than the window; cover a problem wall entirely if you can. Velvet-weight beats lace by a mile.
A rug between you and the mic. Tile is your worst enemy; a thick rug over the recording area kills the floor bounce. Foam mats underneath make it even better.
The duvet trick. Hang a duvet or heavy blanket on the wall behind the microphone (not behind you – behind the mic, where your voice’s reflections come from). Two duvets on stands at angles behind the mic create a “vocal booth” effect that punches absurdly above its cost. Ugly? Slightly. Effective? Extremely. Audio-only shows should abuse this trick freely; video shows can hide treatment off-camera.
A bookshelf, loaded messily. Uneven book spines scatter sound instead of bouncing it back coherently. A full bookshelf is a legitimate acoustic device that also looks great on camera – relevant if you’re following our video podcast setup guide.
The Lagos-specific battles
Treatment fixes echo. Lagos adds noise – a different enemy needing different tactics.
Generator hum: record in the room farthest from the gen, close windows, and lean on dynamic mics, which reject distant rumble far better than condensers. Traffic and street noise: record at quieter hours where you can, and again – close mic technique. The fan/AC dilemma: ceiling fans and AC compressors sit exactly in the frequency range that makes recordings sound cheap. The pro move is to cool the room before the session, switch off while recording, and take breaks. Sweaty, but clean.
If a noise still sneaks through, consistent low-level noise can be reduced in editing; what can’t be fixed is noise that starts and stops mid-sentence. When in doubt, pause the recording – silence is free.
What about real acoustic panels?
Foam panels and rockwool absorbers are the proper version of everything above, and if your show is committed and your room is permanent, a modest number of panels at the first-reflection points (the walls beside and behind the mic) is worth the spend. What’s not worth it: covering every wall in cheap thin foam from the market, which mostly absorbs your money. Thin foam kills only high frequencies and leaves the boxy midrange echo untouched.
But before you spend on panels, prove the room. Record a real episode with the free and cheap fixes plus proper close-mic technique. You may find, as many of our clients do, that you’re already at “nobody can tell” quality. Skipping the room and buying gear instead is one of the classic podcast equipment mistakes.
Or skip the battle entirely
Sometimes the right answer is not fighting your room. Rented broadcast-grade kits with dynamic mics and proper monitoring are forgiving of imperfect spaces – and a mobile recording setup means you can record in whichever location sounds best, not just where you live. It’s part of why we tell new creators to rent gear before building a studio: you learn what your space needs before spending on it.
Not sure if your room is workable? Send us a voice note recorded in it, seriously, and we’ll tell you what we hear and what to fix, plus a kit recommendation if you need one. Message 527 Sounds on WhatsApp.